By Hannah Phillips
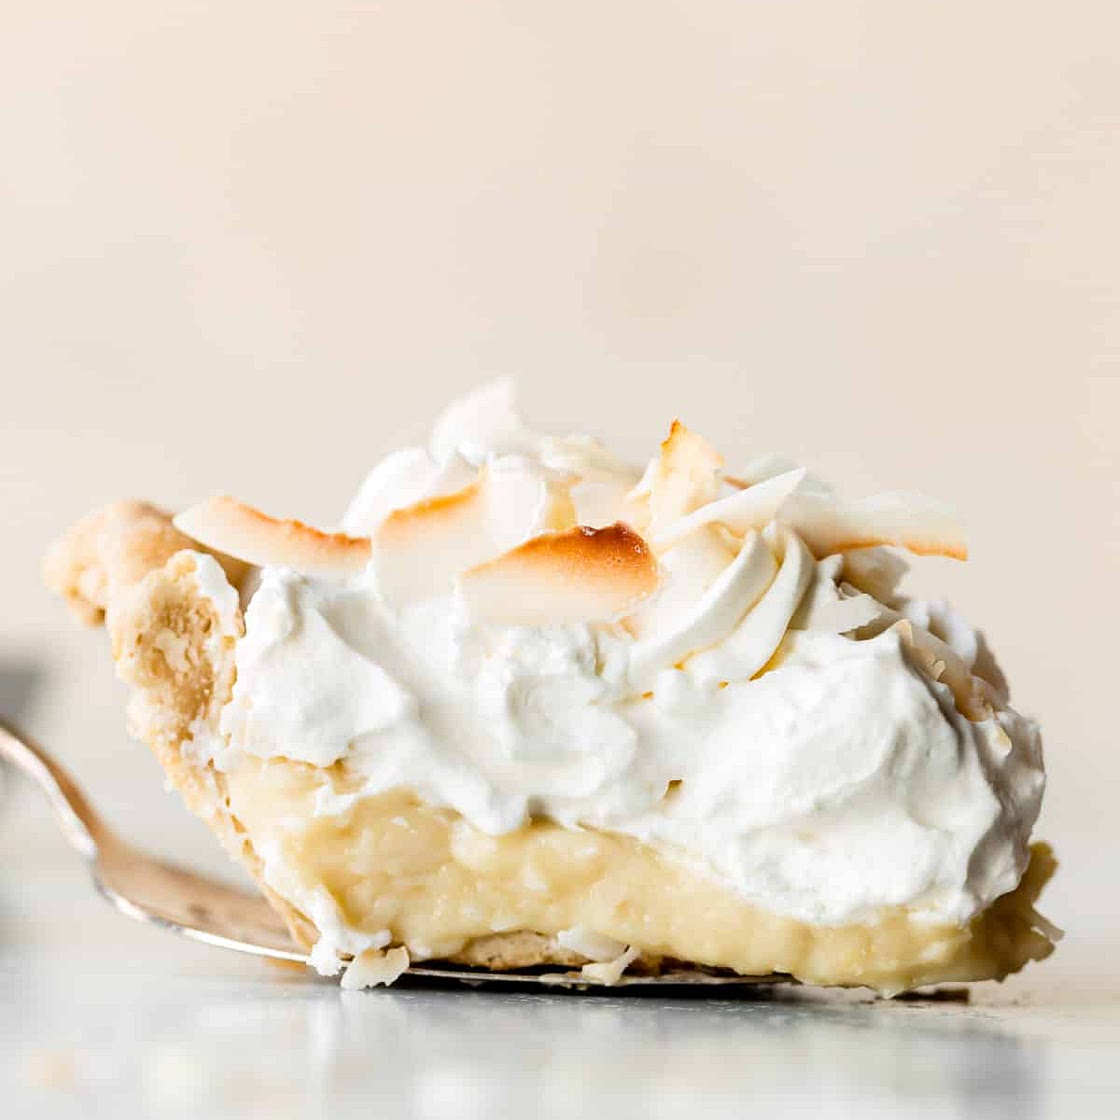
Homemade Coconut Cream Pie
11 steps
Prep:6hCook:35min
This coconut cream pie recipe features a thick and creamy coconut filling, crispy pie crust, sweet whipped cream, and toasted coconut. There are plenty of ways to make this coconut cream pie recipe ahead of time. See various steps.
Updated at: Tue, 14 Nov 2023 12:14:28 GMT
Nutrition balance score
Unbalanced
Glycemic Index
59
Moderate
Glycemic Load
28
High
Nutrition per serving
Calories607.5 kcal (30%)
Total Fat45.8 g (65%)
Carbs45.8 g (18%)
Sugars25.4 g (28%)
Protein5.5 g (11%)
Sodium251.9 mg (13%)
Fiber1.2 g (4%)
% Daily Values based on a 2,000 calorie diet
Ingredients
8 servings
1flaky pie crust
unbaked, what i used, or all butter pie crust
4egg yolks
large
¼ cupcornstarch
1 x 14 ouncecan full fat coconut milk
1 cuphalf-and-half
⅔ cupgranulated sugar
¼ teaspoonsalt
1 cupsweetened shredded coconut
30gunsalted butter
softened to room temperature
1 teaspoonpure vanilla extract
½ teaspooncoconut extract
Whipped Cream
Instructions
Pie crust
Step 1
I like to make sure my pie dough is prepared before I begin making coconut cream pie. Make pie dough the night before because it needs to chill in the refrigerator for at least 2 hours before rolling out and blind baking (next step).
Step 2
Preheat oven to 375°F (190°C). Fully blind bake the pie crust. (Follow how to blind bake pie crust instructions through step 9. I skip the optional dough strip trick in step 4, though that trick guarantees thick pie crust edges. Crimp or flute the pie crust edges before baking.) Cool pie crust completely. You can do this up to 3 days ahead of time. Cover cooled crust tightly and refrigerate until ready to fill.
Coconut filling
Step 3
Whisk the egg yolks and cornstarch together. Set aside. Whisk the coconut milk, half-and-half, granulated sugar, and salt together in a medium saucepan over medium heat. Whisking occasionally, bring to a boil. Boil for 2 minutes, then reduce temperature to medium-low heat. Once boiling, remove about 1/2 cup of the mixture and, in a slow and steady stream, whisk into the egg yolk and cornstarch mixture. Keep those egg yolks moving so they don’t scramble. In a slow and steady stream, pour and whisk the egg yolk mixture into the pot.
Step 4
The pudding will immediately begin to bubble and thicken. Stand back and use caution as the bubbles may burst. Whisk and cook for 1 minute and 30 seconds. Remove from heat and stir in the coconut, butter, vanilla, and coconut extract (if using).
Step 5
Pour warm filling into cooled pie crust. Cover tightly with plastic wrap directly on the surface of the pudding (to prevent a skin from forming) and refrigerate for at least 3 hours or overnight until chilled and thickened. Pie may be refrigerated for up to 1 day.
Step 6
Whisk the egg yolks and cornstarch together. Set aside. Whisk the coconut milk, half-and-half, granulated sugar, and salt together in a medium saucepan over medium heat. Whisking occasionally, bring to a boil. Boil for 2 minutes, then reduce temperature to medium-low heat. Once boiling, remove about 1/2 cup of the mixture and, in a slow and steady stream, whisk into the egg yolk and cornstarch mixture. Keep those egg yolks moving so they don’t scramble. In a slow and steady stream, pour and whisk the egg yolk mixture into the pot.
Step 7
The pudding will immediately begin to bubble and thicken. Stand back and use caution as the bubbles may burst. Whisk and cook for 1 minute and 30 seconds. Remove from heat and stir in the coconut, butter, vanilla, and coconut extract (if using).
Step 8
Pour warm filling into cooled pie crust. Cover tightly with plastic wrap directly on the surface of the pudding (to prevent a skin from forming) and refrigerate for at least 3 hours or overnight until chilled and thickened. Pie may be refrigerated for up to 1 day.
For the whipped cream
Step 9
Using a hand mixer or a stand mixer fitted with a whisk attachment, whip the heavy cream, sugar, and vanilla extract on medium-high speed until medium peaks form, about 3-4 minutes. Medium peaks are between soft/loose peaks and stiff peaks and are the perfect consistency for topping and piping on desserts.
Step 10
Pipe or spread the whipped cream on top. I used Ateco 849 piping tip to pipe. Garnish with extra coconut, if desired. Chill the pie uncovered up to a few hours or you can serve it immediately.
Step 11
Cover leftovers and store in the refrigerator for up to five days
View on sallysbakingaddiction.com
↑Support creators by visiting their site 😊
Notes
0 liked
0 disliked
There are no notes yet. Be the first to share your experience!
