Uszka
Leave a note
Nutrition balance score
Good
Glycemic Index
69
High
Nutrition per serving
Calories1592 kcal (80%)
Total Fat34.7 g (50%)
Carbs263.2 g (101%)
Sugars8.2 g (9%)
Protein44.6 g (89%)
Sodium1980.8 mg (99%)
Fiber16.5 g (59%)
% Daily Values based on a 2,000 calorie diet
Ingredients
0 servings
FOR WILD MUSHROOM FILLING
30gdried porcinis
or bay boletes, Polish ‘borowik’ and ‘podgrzybek’ respectively
1 cupwater
175gonion
medium
230gchestnut mushrooms
fresh
1 Tbspoil
canola
1garlic clove
1 tspdried thyme
salt
freshly ground black pepper
for seasoning
3 Tbspwhite dry wine
can substitute for water
1 Tbspparsley
finely chopped
FOR 'USZKA' DOUGH
Instructions
FOR THE FILLING:
Step 1
Pour a glass of water over the dried porcinis and cook over a low heat for 30 minutes. (This can be done in advance e.g, a day before.).
Step 2
Once that’s done, it’s worth keeping the remaining ‘mushroom water’; it’s useful in flavouring other dishes such as stews and soups. Keep it refrigerated or freeze it.
Step 3
Peel the onion, slice it finely. Do the same with chestnut mushrooms and cooked porcinis.
Step 4
Heat up a tablespoon of oil in a frying pan. Sauté finely chopped onion for a few minutes over a medium heat, until it turns translucent.
Step 5
Add minced garlic clove and continue frying for another 30 seconds, stirring along the way. Add all the mushrooms we chopped, together with a teaspoon of dried thyme and a pinch of nutmeg. Season with salt and pepper.
Step 6
Reduce the heat to ‘low’ and cook the mushrooms gently, stirring occasionally. Mushrooms will release their juices first, and then they’ll evaporate.
Step 7
As the pan gets dry, add in 3 to 4 tablespoons of white wine, increase the heat to ‘medium-high’ and continue cooking until the wine evaporates completely. Make sure to stir from time to time, so that nothing sticks too badly to the pan.
Step 8
Have a taste - does it need more seasoning? If so, add a bit more salt and pepper. Add finely chopped parsley leaves.
Step 9
To make ‘Uszka’ assembly a bit easier, it’s worth grinding down the filling even more. You can use an immersion (hand-held) blender, or just chop everything again with a knife.
Step 10
I enjoy a little bit of texture in the filling, so I divide the mass into two. I leave one part as-is (straight off the pan) and grind the other part with a blender into a smooth paste. Then I combine the two.
Step 11
Store the mushroom filling in the fridge, until you’re ready to assemble the dumplings.
FOR THE DOUGH:
Step 12
Sift the flour and salt into a large bowl. Pour in a tablespoon of oil.
Step 13
Gradually pour hot water into the flour, mixing with a spoon as you go.
Step 14
Dust your work surface with flour. Move the dough ball onto it.
Step 15
Knead the dough until soft and smooth.
Step 16
Form a ball, cover it with a kitchen cloth and set aside to rest
ASSEMBLY:
Step 17
Sprinkle the worktop with flour. Divide the dough into four parts. Roll each part (keeping the rest covered) into a thin layer of dough - like super-thin! 0.04-0.08 in (1-2 mm).
Step 18
Using a rim of a small glass (or a round cookie cutter), cut out circles from the dough.
Step 19
In the center of the cut circle, put about half a teaspoon of the filling and glue it together, forming a crescent (just like for pierogi).
Step 20
Then connect both ends to form a ring - it's best to wrap the dumpling around your little finger and stick the ends together. If it’s not sticking, wet the ends with a tiny bit of water.
Step 21
Place the ready-made ‘Uszka’ on a pastry board or your work surface, sprinkled with flour. Cover them with a cloth until you’re ready to cook them all.
COOKING:
Step 22
Prepare a pot of boiling water and salt it generously. Throw in a few 'Uszka' dumplings at a time, but not too many - so that they don't lower the water temperature significantly.
Step 23
After throwing them into the water, stir the dumplings very gently. We don’t want them to stick to the bottom.
Step 24
Once the dumplings start to float, continue cooking for another minute.
Step 25
Using a slotted spoon, retrieve cooked ‘Uszka’ and place them on a plate - but make sure they don’t touch each other (they tend to stick).
Step 26
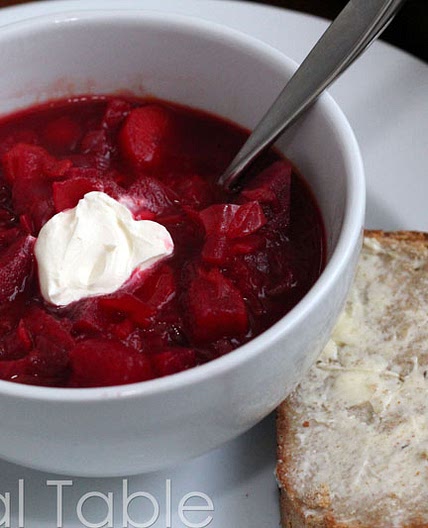
Once they cool ever-so-slightly, serve them in your borscht. Otherwise, wait for them to cool completely and move into a container with a lid, then refrigerate
Notes
0 liked
0 disliked
There are no notes yet. Be the first to share your experience!
