Chow Chow with Variations and Canning Instructions
100%
0
By Aimee Andrichak
Chow Chow with Variations and Canning Instructions
1 step
Prep:1hCook:1h
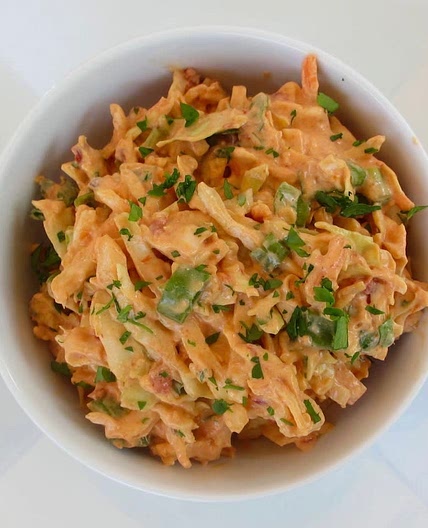
This recipe includes several variations, including nightshade free, pickallili, mild, curry, & spicy.Spicy. Makes about 6 quarts.
Updated at: Thu, 17 Aug 2023 05:09:15 GMT
Nutrition balance score
Unbalanced
Glycemic Index
53
Low
Nutrition per serving
Calories612 kcal (31%)
Total Fat4.5 g (6%)
Carbs113.3 g (44%)
Sugars66.9 g (74%)
Protein22.5 g (45%)
Sodium38007.5 mg (1900%)
Fiber29.2 g (104%)
% Daily Values based on a 2,000 calorie diet
Ingredients
0 servings
Instructions
Step 1
Add-ins to make spicy version: 4-6 jalapenos, finely sliced
2 teaspoons red pepper flakes Add-ins to make curry version:
½ cup Jamaican Curry Powder
1 teaspoon cinnamon
1 teaspoon cardamom
1 teaspoon ground allspice Add-ins to make winter spice version:
1 teaspoon cinnamon
½ teaspoon ground cloves
1 teaspoon allspice
¼ cup fresh grated ginger Nightshade free ingredients:
10 cups green cabbage, coarsely chopped 2 onions, finely chopped
2 cups carrots, coarsely chopped
⅓ cup pickling salt
2 ½ cups cider vinegar
1 cup light brown sugar (optional)
4 cloves garlic, minced
1 tablespoon celery seed Add-ins for Pickalilli:
2 tablespoons ground mustard
¼ cup mustard seeds Combine the chopped vegetables in a large non-reactive stock pot with a tight fitting lid. Non-reactive means it should be stainless steel, or have an enamel coating. Aluminum pots or cast iron will leach metal into the food, because of the acidity of the mixture. Add the salt toss the vegetables to thoroughly combine. Cover, and let rest for 6 hours or refrigerate overnight. After it has rested, drain the vegetables and rinse. Set aside. In your non-reactive stock pot, bring the vinegar, brown sugar (if used), and spices to a boil on medium-high heat. Add the drained vegetables to your boiling pickling liquid, and return to a boil. Reduce heat to low and simmer for 30 minutes. Warm up your pickling jars (I use the heat-dry cycle on my dishwasher to warm everything up). With a wire spider or slotted spoon, pack your vegetables into your canning jars just up to the top of the storage space, leaving the last ½ inch where the lid screws on empty. Add just enough liquid to cover the vegetables. A canning funnel helps tremendously in this step. With a damp tea towel wipe the rims of the jars, to be sure you get a tight seal. Place the flat top on the jars, and tighten the sealing ring, but be careful not to screw it on too tight! While putting the food into the jars you can begin filing your large canning pot, and setting the water to boil. You can use a pot designed for this, or a very large stock pot with a wire rack in the bottom. I fill mine about 3 inches above the resting rack, and also have a large kettle on to boil in case I need to add more water. Add the jars to the canning pot, making sure that the water covers the lids by 1 inch. Boil for 10 minutes. Using canning tongs (they are designed to move the hot jars, and a very worthwhile investment) remove the jars to a towel laid flat on the counter, and allow to rest there until room temp. Each jar should have the flat lid pulled tight by the time it is cool. If any of your jars do not have a tight seal (they make a popping sound when you push repeatedly on the lid) that means it didn’t seal. Keep those in the fridge and use them up first! Arrange the filled jars in the canner and add more water, as needed, to be at least 1 inch above the jars. Bring to a full boil. Cover and continue boiling for 10 minutes. Remove the relish to a rack to cool completely.
Notes
1 liked
0 disliked
There are no notes yet. Be the first to share your experience!
