1/3

2/3

3/3
100%
0
By Anne Hy
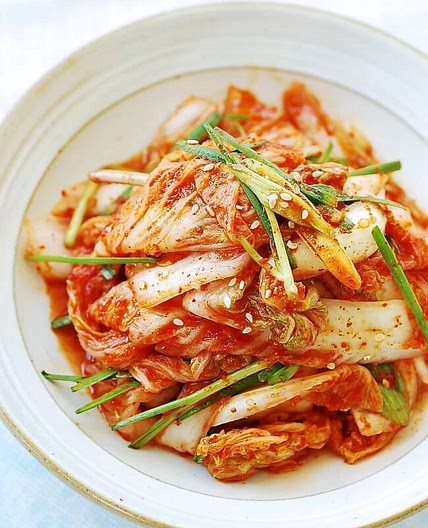
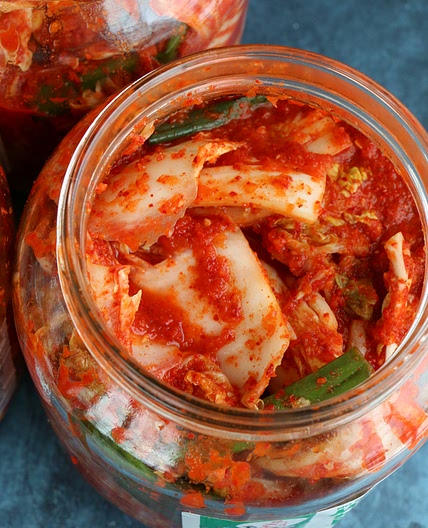
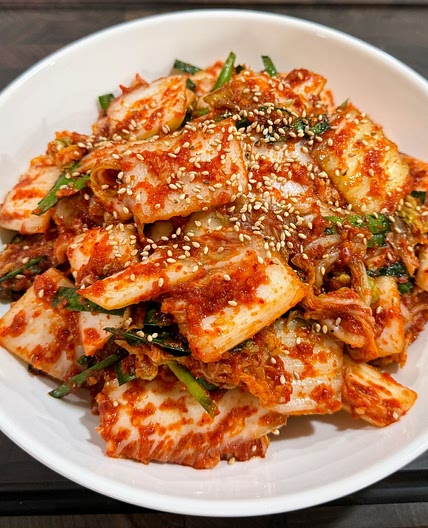
BAECHU KIMCHI (배추김치 • Napa Cabbage Kimchi)
My wehsoongmoh (my uncle’s wife) bent over the silver bowl, which was so wide she couldn’t link her hands around its rim if she’d had to. She fished out one scarlet piece of cabbage and began wrapping it like a small package.
“It is important not to let the gas out, Sun Young, because that is what’s going to make the kimchi taste delicious. So you have to take one leaf and wrap the rest together, tight and neat, just like this,” she said, as she presented what looked all too much like a beating heart, resting in her hands.
“Where did you learn this? Who taught you this?” I asked, thinking of all the YouTube videos I’d watched on kimchi-making and how none of them had ever mentioned this technique.
“You know, I lost my mother when I was very young. I used to watch her in the kitchen. And when she died, all of a sudden, all those memories came back to me. Because I missed her.”
MAKES 1 HALF-GALLON JAR
DIFFICULTY: Hard
ALLERGENS: GFO, NF
Updated at: Wed, 16 Aug 2023 18:01:06 GMT
Nutrition balance score
Uh-oh! We're unable to calculate nutrition for this recipe because some ingredients aren't recognized.
Ingredients
1 servings
FOR THE PASTE
2 tablespoonssweet white rice flour
2 tablespoonsbrown rice syrup
or maple syrup, I prefer brown rice syrup
¼ cupgarlic
minced
1 knobfresh ginger
sliced
0.5onion
roughly chopped
¼ cupPersimmon Puree
or roughly chopped Korean pear or apple
¼ cup“Fishy” Sauce
or soy sauce
1 tablespoondashima powder
1 cupgochugaru
1 cupdaikon radish
julienned
½ cupjulienned carrots
3scallions
cut into 1 1/2-inch lengths
1 cupgarlic chives
2-inch lengths
Instructions
Step 1
Rinse both heads of cabbage under cold water and pat them dry. Trim off the bottom stubs (if any) of the cabbage heads. With a large sharp knife, starting at the butt of the cabbage head, create a 2-inch slit down the middle. With your hands, use the slit to tear the rest of the cabbage head right down the middle. Tearing the cabbage head (as opposed to cutting it with your knife) preserves the beautiful shape of the cabbage leaves in the middle.
Step 2
You will now have two halves of the cabbage head. Create a 2-inch slit at the butt of each cabbage half, but do not tear the section in half (you will do that later).
Step 3
Rinse all the cabbage leaves once more so that they are damp. You will now need to salt each leaf. Place the cabbage half so that its internal leaves are facing up. Begin by sprinkling salt over the top leaf, then gently lifting that leaf up to reveal the leaf beneath it. Sprinkle with more salt, making sure to press the salt into the crevices toward the bottom (where the leaves are much thicker). Repeat this process until all the leaves are salted.
Step 4
Place the cabbage in a humongous bowl and allow it to rest for at least 2 hours, but preferably 4 hours, turning the cabbage every 30 to 45 minutes. You will notice that over time, a reservoir of liquid will accumulate in the bowl. Baste the cabbage with this brine for additional flavor.
Step 5
Meanwhile, make the paste: In a small pot, combine the sweet white rice flour and 1 cup water and cook over medium-high heat, stirring constantly to avoid clumping. It should come to a gentle boil in a few minutes, at which point it will begin to thicken. Add the brown rice syrup and cook for a little longer, continuing to stir, until the mixture thickens into a paste. Remove it from the heat and set aside to cool.
Step 6
In a high-powered blender, combine the garlic, ginger, onion, persimmon puree, “fishy” sauce, and dashima powder. Blend until smooth.
Step 7
In a large bowl, combine this garlic/ginger mixture with the cooled rice flour paste. Add the gochugaru. Stir in the julienned radish, carrots, scallions, and garlic chives.
Step 8
After 4 hours, the cabbage should be pretty “bendy”—it should not readily snap. Rinse the cabbage heads in cold water multiple times to remove excess salt and any dirt. Now you can go ahead and tear the cabbage along the slits you placed in them earlier. You should now have 4 equal sections of cabbage per head.
Step 9
As you did with the salt, spread a little of the kimchi paste over each leaf. You don’t need to coat every last square inch of the leaf, but it should be done evenly (i.e., no one leaf should get more than any other!).
Step 10
Take one-quarter of a cabbage and place it on a flat surface so that the smaller “inner” leaves are facing up. With the exception of the widest leaf at the bottom (which you do not want to roll), roll the remaining section of the cabbage from the leafy tip down to the thicker “butt.”
Step 11
Pull the bottom leaf (which you didn’t roll) up and around the rolled cabbage, so that it creates a lovely tight “package” of cabbage. Doing this will prevent additional air pockets and facilitate optimal fermentation.
Step 12
Place the “cabbage package” into a large mason jar and press down (gently) to squeeze out any additional pockets of air. Repeat with the remaining sections of cabbage.
Step 13
Add any leftover paste. Push down gently. You can also add a clean stone as a weight (my hahlmuhnee always did this) if you want to make sure it’s compact.
Step 14
Put the lid on the jar (not too tight, since the gasses released from the fermentation process could cause it to pop) and place it in the refrigerator for at least 1 week (I like waiting a full 3 weeks before enjoying). You can also leave it at room temperature for quicker (but smellier) fermentation.
Step 15
Exercise caution when you unscrew that lid for the first time. Gas will have built up from the fermentation and if the jar is packed to the very top, it’s possible the kimchi juices will overflow as soon as you crack it open. Open the lid slowly and over the sink.
Notes
1 liked
0 disliked
Delicious
Easy
Go-to
One-dish
Special occasion
There are no notes yet. Be the first to share your experience!
