By Anne Hy
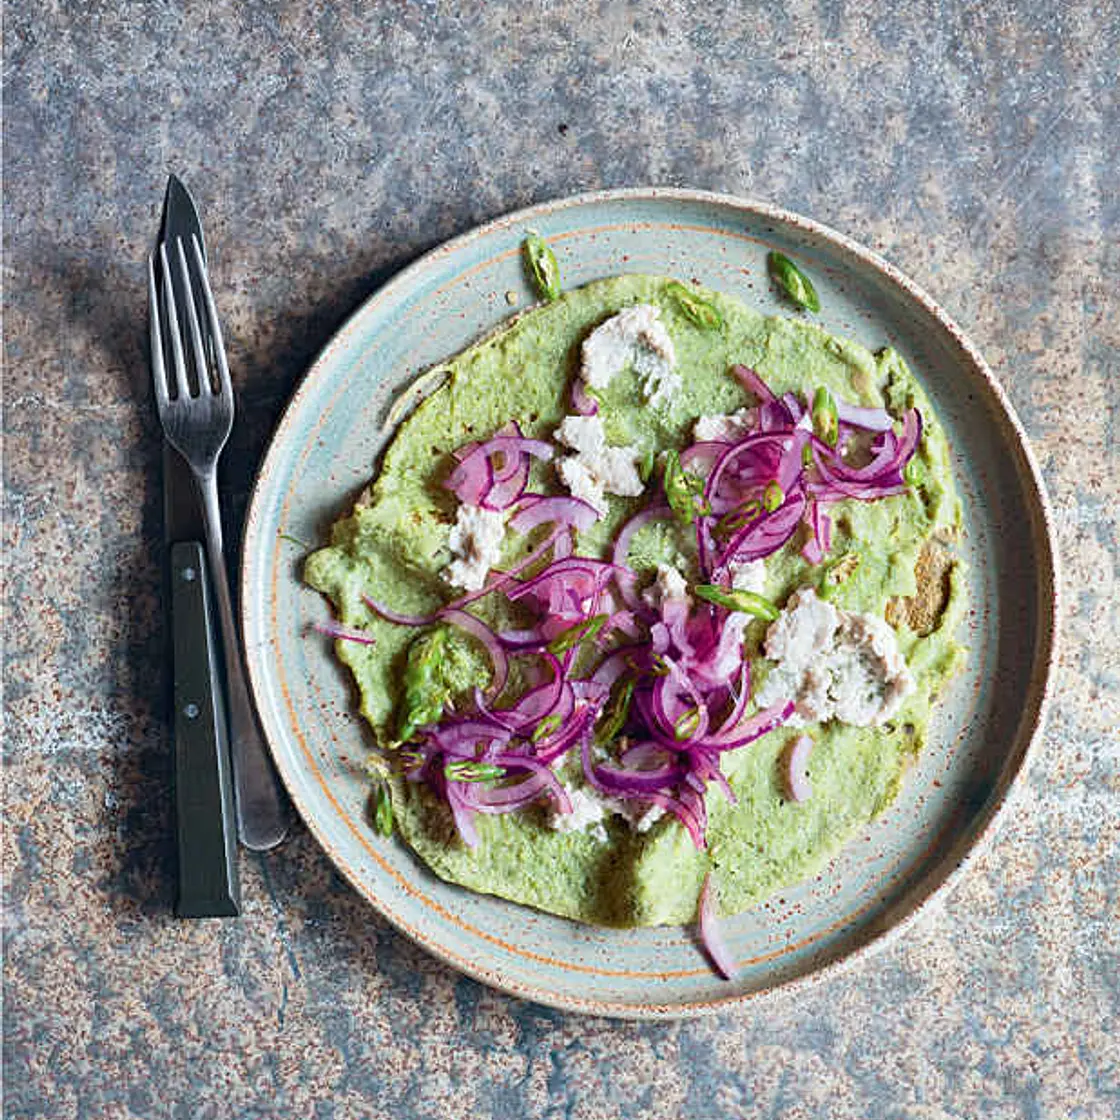
PESARATTU GINGER AND CHILLI MOONG BEAN CREPES
These crisp crepes from the state of Andhra Pradesh, made with whole green moong beans, are bursting with fresh and earthy ginger, coriander and chilli. Consider this recipe as a gentle introduction to making Dosa it uses a similar technique but requires no overnight soaking or fermenting.
You will need a high-speed blender to make smooth crepe batter and a non-stick or well-seasoned pancake pan.
If the swirl technique described below isn’t for you, just use a ladle and a small frying pan to get perfectly round pancakes every time. Traditionally, you would serve these with Coconut Chutney sliced green chillies and raw onions.
TIP My friend Arundati, who made these for me in Hyderabad, recommends adding a couple of tablespoons of rice flour to the batter to make them crispy. However, Aunty, who makes the most incredible ones in her famous restaurant in Vishakhapatnam, doesn’t. Over to you.
Updated at: Thu, 17 Aug 2023 07:36:11 GMT
Nutrition balance score
Unbalanced
Glycemic Index
28
Low
Glycemic Load
4
Low
Nutrition per serving
Calories213.6 kcal (11%)
Total Fat15.1 g (22%)
Carbs14.7 g (6%)
Sugars2.9 g (3%)
Protein5.5 g (11%)
Sodium201.7 mg (10%)
Fiber5 g (18%)
% Daily Values based on a 2,000 calorie diet
Ingredients
12 servings
200gmoong beans
fresh root ginger
2.5cm, finely grated
2green chillies
finely chopped
2 Tbspcoriander
chopped
salt
oil for frying
TOPPINGS
COCONUT CHUTNEY
100gdesiccated coconut
250mlwater
hot
1green chilli
fresh root ginger
1 c m
1 tsptamarind paste
½ tspsalt
or to taste
2 TbspBengal gram
split, dry-roasted in a pan
FOR THE TEMPERING
Instructions
Step 1
Wash the moong beans by rinsing in a sieve under a cold tap until the water runs clear. Tip into a glass or non-metallic bowl, add plenty of cold water and leave to soak for 2 hours.
Step 2
When the time is up and they have swollen to almost twice their size, drain and place in a blender with 375ml (1½ cups) cold water, the ginger and green chillies and blend until you get a smooth batter. Now stir in the chopped coriander and salt to your taste. The batter keeps for a day without losing colour and thickens in texture so you will need to loosen it with a bit of cold water to get a pancake consistency if you make this in advance.
Step 3
Place a crepe or pancake pan over a high heat with a teaspoon of oil. The pan needs to be greasy to avoid sticking but not too oily – as the oil heats in the pan, use a spatula to spread the oil around the base of the pan, wiping off any excess gently with kitchen paper. When the pan is hot, lower the heat to medium, giving the pan a few seconds to adjust to the new temperature. If all this sounds complicated, it really isn’t. As with everything, practice makes perfect.
Step 4
Now, spoon a ladleful of batter into the centre of the pan and quickly use the base of the ladle to swirl the batter around the pan in a giant circle.
Step 5
You will get webbed areas in the crepe, which is a good thing as it makes it crisp.
Step 6
Leave the crepe to cook for 2 minutes, drizzling a teaspoon of oil over the surface of the crepe and tilting or shaking the pan to spread this around.
Step 7
The base of the crepe should be golden and crisp; you can sneakily peek by lifting an edge to check. When it’s done, slide the crepe out of the pan and onto a plate. Keep warm while you make the rest of the crepes.
CHUTNEY
Step 8
Spicy, fragrant and an essential accompaniment to south India’s fermented foods, coconut chutney is a must-have in every Indian kitchen. This is the most common south Indian chutney, but each state and family has its own variations. If I don’t have split Bengal gram to hand, I often use Greek yoghurt to thicken the chutney instead. This can easily be whipped up on a quiet evening and, although it’s borderline heretic, I confess I often forgo the tempering.
Step 9
Use a small hand blender or high-speed blender to grind the coconut down well. Desiccated coconut beefed up with the coconut oil in the tempering does just fine, but use fresh coconut if you have it, adding less hot water to get the desired thick but smooth consistency. Recipe pictured here.
Step 10
First put the coconut into a blender, along with the hot water, and leave to sit for 5 minutes until it rehydrates.
Step 11
Now, add the rest of the chutney ingredients to the blender and purée until creamy and integrated, but still with some texture. Check for salt and add more if you need to, blending again gently to mix it in. Now tip the chutney into a bowl and make the tempering.
Step 12
Put the coconut oil into a small frying pan and place over a high heat.
Step 13
When it’s hot, tip in the asafoetida and then add the rest of the ingredients in quick succession. As soon as the curry leaves sizzle up, pour the lot over the coconut chutney.
Step 14
This will last in an airtight container for up to a week in the fridge or in the freezer for up to a month. Stir well before serving.
Step 15
TIP You can add an extra green chilli, 4 tablespoons of chopped coriander or both to the coconut before grinding into a paste, for a herby twist on the main recipe.
Notes
1 liked
0 disliked
Crispy
Delicious
Easy
Go-to
Makes leftovers
There are no notes yet. Be the first to share your experience!
